
Once upon a long time ago, actually 1969, I bought a 6-inch mirror making kit from Edmund Scientific for an amazing price of $19.95. I got a 55-gallon drum. Filled it with water. Following directions as I remember, I started grinding and had to place the drum on three pieces of wood to keep the drum from tipping. From what I remember the drum kept tipping anyway. So I reduced the pressure I was placing on the mirror and the tool. After an hour I had about an area the size of a half dollar (remember those!) scratched up in the center of the glass. Lots of work. Lost interest very fast! I put the mirror kit away and thought some day that I may get back to it. That day never came due to living life!
Now 35 years later I WANT TO MAKE A TELESCOPE again! I got Berry’s book on how to make a telescope [Build Your Own Telescope by Richard Berry (Willmann-Bell)]. I decided to make a Newtonian type. So I took a short cut and ordered the optics, focuser, spider on eBay. Mirror cell from University Optics. Tube and wood from Home Depot. So far I have about $200.00 into this project. Could I buy a 6” scope for this price? Nope sure can’t. Go John, Go. Reading Berry’s book I decided to make the German mount type.
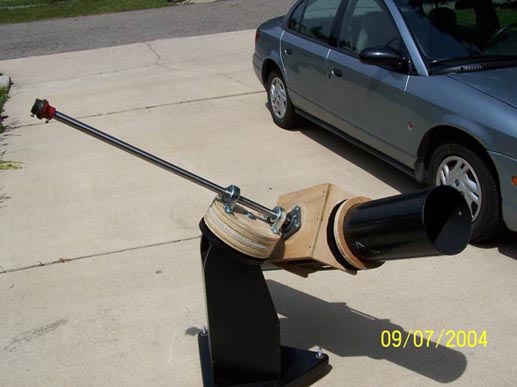
It works and is functional, ‘taint pretty.
I bought some good 3/4 inch birch plywood that Home Depot cut into two by four strips for me. I took the wood home and put it in the garage. I got out a tablet and started drawing out the pieces of plywood needed to make the pier and polar head. Woops, I forgot the Teflon and the Formica! Ordered the Teflon thick from a vendor on the Internet. The thinnest I could find was a 1/16 and bought it. More about the Formica later. I started laying out the tube and did a 1 to 1 scale drawing. Measuring the parts and figuring the placements was easy. Time will tell if assembly was easy or not.
Start woodworking. Marked off the parts to maximize the use to the plywood. Lots of angles and curves. Many straight lines inside the edges that I may be able to cut using a circular power saw. Nope not that good. Go buy a nice table saw, yea a table saw and I can use it for other things too. Go John, go. To Lowe’s and get a table saw and a table drill press ‘cuz you’ll need it too. Uh huh. Well there is at least two hundred dollars more into this homemade scope. (You’re going to spend more, bet on it.)
I started cutting out the wood that I laid out. Sawdust everywhere! Since I just purchased a Shop-Vac that suited this purpose quite well, what is 40 bucks among friends anyway? The pier turned out not to be too bad. Now, to drill the holes for the threaded rods. What threaded rods? Consult Berry’s book again. Oops hardware! Back to Lowe’s because I did not remember or list the things I needed. Took Berry’s book with me and I set out for Lowe’s - fortunately only a couple of miles away. What’s another 25 or 30 Dollars? Keep on spending - its needed anyway since I did not have the necessary stuff.
All these pieces don’t quite fit. They need to be modified somewhat. Ah huh. A belt sander would work nicely since I didn’t have one! What is another 80 Dollars? (El Cheapo too. I will pay for that later too.) Where in the hell am I going to put that thing? Well the drill press is setting on a roll-a-round cart. Good! I just turned the top tray upside down and place the sander on it. Fine sawdust every where! By this time the leaves started falling and there were plenty too. Man, leaf raking is lots of work! Hey, a leaf blower would fit the bill and could blow away all that dust too. Oh well, there goes another hundred dollars.
The Formica was given to me by a counter top and cabinet shop out on Carpenter Road. It was a 2 feet by 8 feet sheet of Formica, I mounted it on the plywood and proceeded to cut out the polar mount circles. I still have plenty left for other projects.
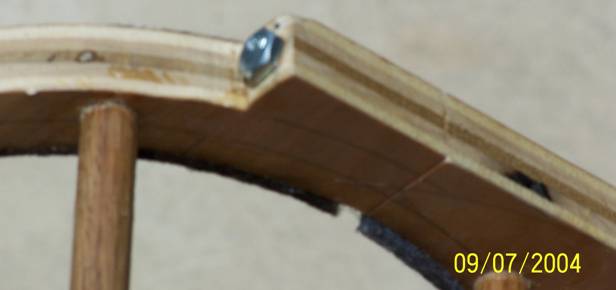
I did the polar head twice for several reasons. My first attempt to cut circles was with a power hand jigsaw and the circle was not too smooth at the edges. They slightly resembled circles that I tried to use the sander on and came close. I will take that. Now to drill the holes. I needed a half-inch drill and did not have one - went to Harbor Freight and purchased a set of drill that went up to a half inch. The drill press could not take the 5-inch radius I needed for the polar headboards. I went back to Harbor Freight and purchased a drill guide to drill the holes straight. Ha! Holes drilled, edges sanded and Teflon cut, lets partially assemble this puppy! What is this wobble when I spin the wooden disk around? Hole not perpendicular to the plane of the wood. How could that be? I used a drill guide! Anyway, to make this work I re-drill the holes. I cut some half-inch wood dowels, glued them in and sanded them off since I have a sander now. I know why the people who do this kind of work are called craftsmen. Preparation is the biggest help; but you need to be careful.
The polar head was assembled and seemed to work ok. Mount that puppy to the pier. Some of the hardware was hard to reach, as the pier base was off somewhat due to my estimation on how wide to make the pier box that stood upright. Too wide. It kind of worked. I accepted that and started on the rest of the polar head and cradle parts. I made the pillow blocks in Berry’s book. Tried to mount the polar head and cradle; I needed at least 3/8 of more height on the V’s on the base side to align up properly. Also this did not rotate properly. The two-inch pipe and the mounting flange were not square and would wobble - it could not be used even if the pillow blocks were made properly. I scrapped this idea and decided to redesign the cradle mount and pillow block arrangement. I needed some kind of rod to mount to the head to be 90 degrees from the North Star. I looked for several things that would work and finally settled on a one-inch drill rod for the polar axis. Boy, that was heavy. I should have had a clue then. I purchased the pillow blocks at Granger one a panel mount and two standard pillow blocks to fit the drill rod. And that worked nicely, kind of. I won’t tell you what that cost me.
Mounted the tube to test the cradle and it was too tight. Some of the circular part of the cradle needed to be enlarged. My sander provided the instrument to do that. I promptly enlarged one end too much and had glued some thick felt to make it work properly.
What about the second set of the polar circles? I used my router and made a circle guide out of some 18-gage stainless steel that I had. Several holes later and some counter sinking, I had made my circle cutter. It worked well and I had cut them to go with the drill press that I had. I used forester bits with my drill press to do the 1/2 inch holes for the polar mount. (Thanks Costco.) Oh well. I used the forester bits for the other holes in the polar and cradle mount.
I had to knock off the old pillow blocks and Gorilla Glue works great. Too great in this case. I should have used screws to mount them. I mounted the pillow blocks on their respective places. I had to remount the panel pillow blocks and drill new holes in the cradle base. With this done, this arrangement seemed to work fine. I should have known that Murphy was lurking in my garage.
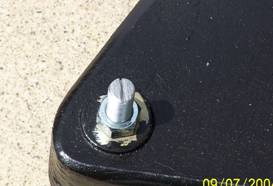
I decided to modify the base as to adjust for the polar alignment. I purchased some 1/2-threaded rod and cut them into 8-inch lengths. I drilled the pier base to accept them and added the hardware to hold them. I could at least have some minimal adjustment for the polar axis. This work well, especially if moving to a hard area that is fairly level. I may have several degrees to play with.
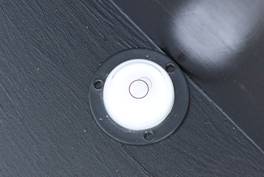
The cradle was mounted to the pier. The tube was mounted to the cradle after it was painted. The polar mount was adjusted so it was aimed at Polaris. After I modified the pier base to give me a much better chance of seeing Polaris, I was off by about 15 degrees. I could not adjust the pier and polar mount to see Polaris. Several other problems appeared at this point. Anybody ever heard of balancing the scope? I had an opportunity to learn it by keeping my hand in the cradle and looking at a star field. I think I will modify the tube and put the weight at the mirror end; to offset the focuser, eyepiece and view finder(s) that I may add.
Balancing is a dynamic process to keep everything in its proper place. The scope started moving as soon as I found something to look at. How annoying!
Finally I had to change the drill rod for something lighter. I spent several days going places to look for something that would work. I found an aluminum paint extension handle at Lowe’s that would fit the pillow blocks. Then the cradle kept moving; some misalignment occurs with panel mounted pillow blocks. The answer to this was to drill a 1-inch hole in the cradle base and to pin the declination axis rod to the cradle base. This worked well. I needed some kind of brake to prevent the tube rotating on the polar axis. I came up with clamp made of wood and installed it behind the first pillow block that I could tighten at will. This arrangement works well at present.
I had been watching the ATM list and had followed the thread on columniation of Newtonian scopes.
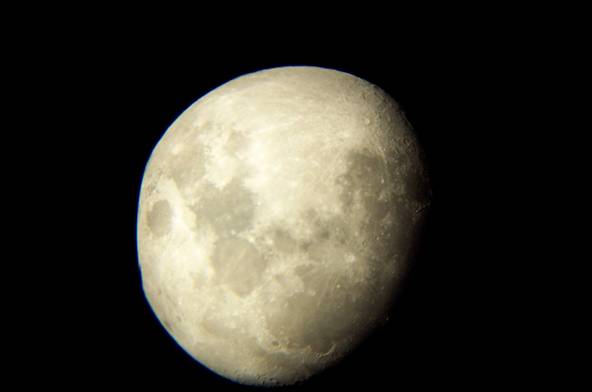
I collimated the scope. And that night I saw ‘first light’ and was thrilled to be using My Scope. I sure have learned a lot about telescopes and craftsmanship during this year.
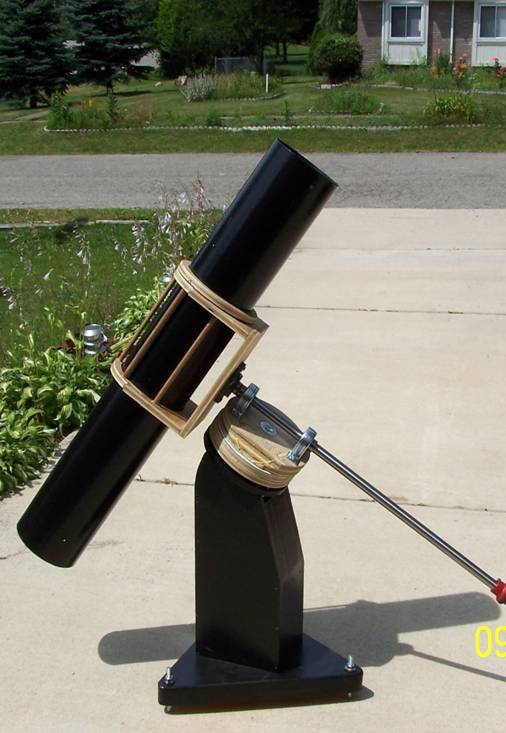
The pictures (seen above and below) show an earlier stage of the scope. The tube has since been painted and all the optical equipment was removed before painting. Also a new polar head and declination axis has been added. Also a star finder thingie. More to balance!
Would I do it again? Now that I have most of all the tools needed to do the job, a resounding yes! I have been toying with the idea to grind my own mirror, perhaps a 6 or 8 inch. Perhaps I could silver my own mirrors. Why? Just because I can. I would like to try anyway just to see if I can. If James Lerch can, so can I. I don’t have all the equipment he has and it will be a task of unending scrounging and yard saleing and possibly making a lot of mistakes. But the pride I felt looking at the heavens for the first time with my scope was indescribable.
The cost is well over $600 now, and I could have bought a nice scope for that, and not used up a lot of time having the fun of doing my own scope.
Well, what do you want from an Amateur? Perfection?
Dark Skies to you.